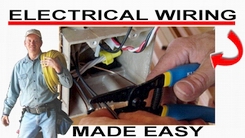
Step 1: Always identify the electrical circuit and make sure it is off. |
 |
IMPORTANT:
Always be sure the outlet circuit is off. Use a voltage tester to verify the power is off before proceeding.
Install the outlet box in an accessible area.
Bring the wires into the box and allow enough length to make your splice. |
Step 2: Using a good pair of wire strippers and pliers. |
 |
After stripping back the insulation about 3/4", twist the bare wire in a clock-wise direction. Trim off the end of the wires evenly. |
Step 3: Use approved wire connectors that are the right size for the splice. |
 |
Select the right size wire connector, otherwise known as a "wire nut". Notice the depth of the connector, your twisted wire sets should not be longer than the depth of the wire connector internal area. Screw the splice connector onto the twisted pair in a clock-wise motion until the connector is good and snug. The bare wire should be all the way into the wire connectors. Bare wire should not be seen. If bare wire is seen, back off the wire nut and trim more of the twisted wire sets and reinstall the connector. |
Step 4: Fold the spliced wires carefully back into the junction box. |
 |
Fold the wire sets carefully into the junction box. |
Step 5: Always install a blank cover onto the junction box. |
 |
Place a blank cover on the junction box and you're all done! You have now made a legal and accessible splice. Turn on the circuit when all the work is completed and completely checked and verified. |


